Send an email
Agilebase can be used to send emails. This facility should NOT be used for marketing purposes, rather as a method to notify people about data associated to the system. For marketing emails, there are more appropriate specifically designed third party apps.
Note: When setting up an email alert, the system needs to know the email address of the recipient. Sometimes this may be very simple, when you always want to send the alert to the same person. For some alerts though you may wish to change who gets it depending on the data, e.g. each salesperson may get the leads assigned to them. In this case, the system will need to know the email address, so it needs to be stored somewhere. For Agilebase users, if they use their email address as their username, the system can pick this up when a user’s assigned to a record, either manually or as part of the automatic ‘created by’ and ‘modified by’ fields
Step 1: add a necessary field
Select the table which has the alert data in it and add a date/time field with SECOND accuracy called e.g. “Last notified”. This will be used by the system to store when the last notification was sent for each record.
Step 2: create a new view
Create a view from the table above, containing all the information you want to send in the email. Sort it by “last modified [auto]” descending, so new items appear at the top.
Step 3: add filters
Add filters so that only records that need an email notification to be sent appear. It’s important that records must disappear once a notification’s been sent otherwise the recipient will be bombarded with repeat alerts.
For simple alerts of new items, add a filter “Last notified IS NULL”. That way, a notification will only ever be sent once for a record.
To set up a repeating monthly alert, you could add a filter “last notified is more than 1 month ago”, with or is blank ticked:
If you have any difficulty thinking up what criteria you need for your purpose, please get in touch.
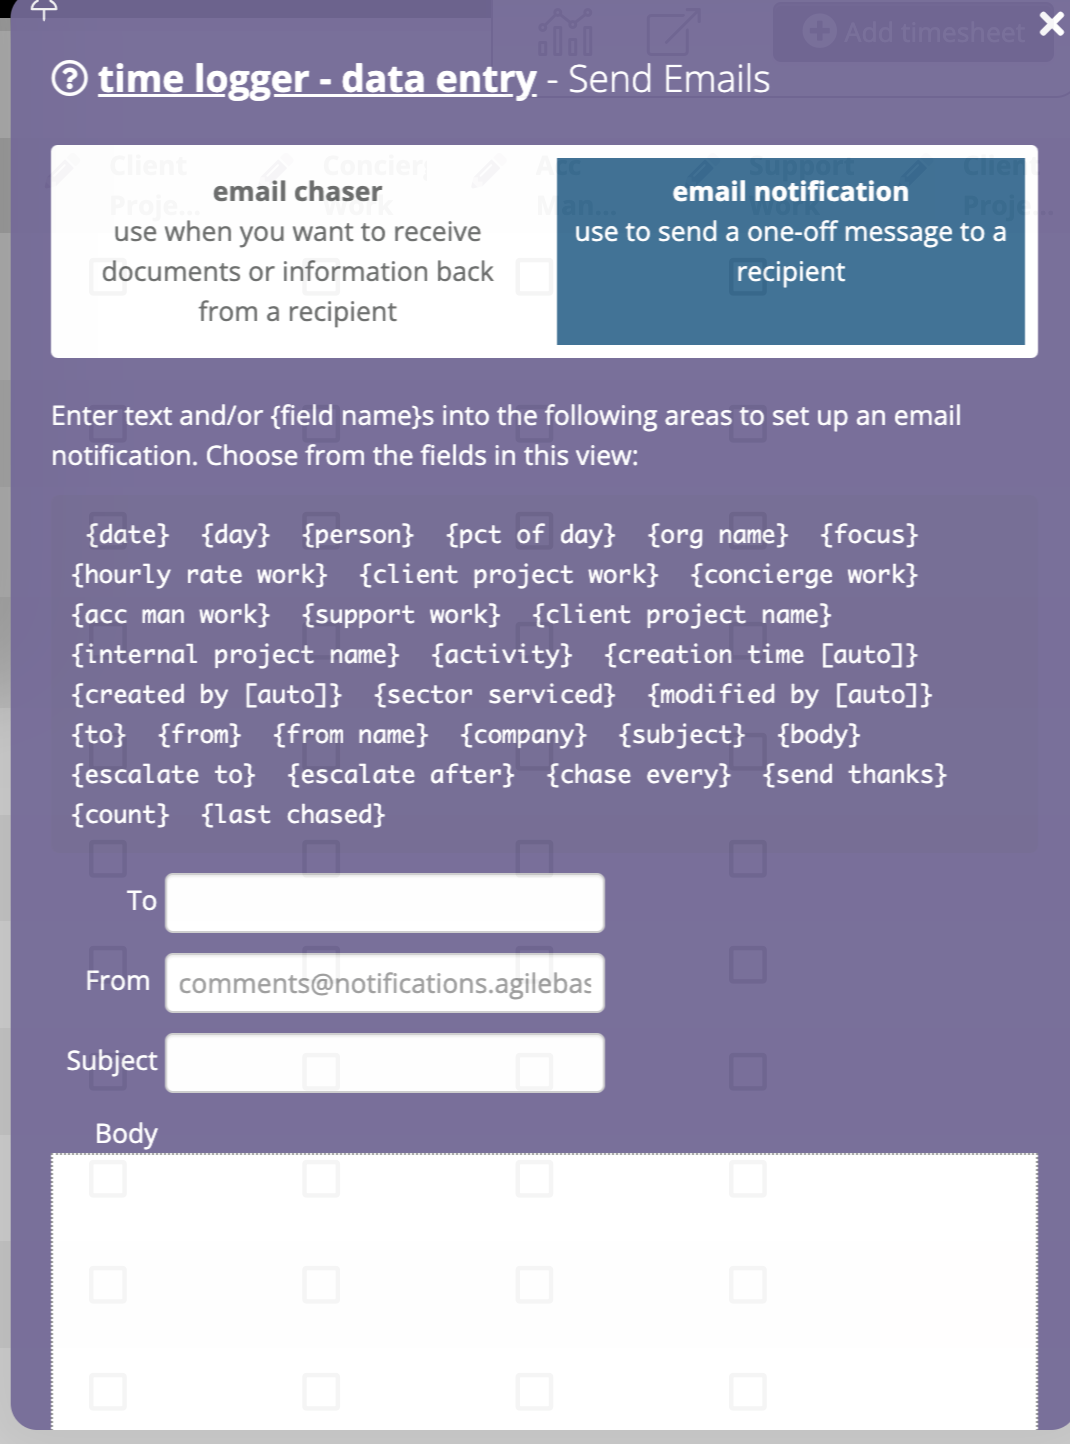
Step 4: fill in an email template
- Edit the view and open the workflow - send emails panel
- Select email notification
- Fill in the subject, to and body of the email. To merge in data from the view, use field names in lowercase surrounded by curly brackets. A typical template would look something like this:
You can attach documents to the email by including the field name for a file in the message.
Under the email template, set “Notification time field” to the field that you created in step 1, e.g. “Last notified”
Note in the To: field, you can include email addresses manually, or merge them in from the view. If you are assigning records to users in Agilebase, you can use that field and the system will automatically pick out the email address for them.
That’s it! Note when testing, we recommend setting the “To:” value to your own email address, just until you’re sure everything’s working properly.
Including attachments
If you add a file field to the view, it will be added to the outgoing email as an attachment. Note the ID field for the file field’s parent table also needs to be present, which should happen automatically.
Including record history
To include a log of recent updates to a record (since the last notification was sent), just add the line
ab_record_history
to the body of the email.
Rich text (HTML) emails
HTML emails can now be sent by apps built on the Agilebase platform. That means that your company can send out branded, rich-text emails (with attachments) to customers, suppliers and anyone else you deal with.
Setting up
Set up an email notification workflow as normal (when editing a view, use the workflow - send emails panel).
Start the body of the email with <html> and end with </html>.
The email will then be interpreted as HTML, i.e. formatted.
You do need to know some basic HTML. If you’d like to get started there are plenty of great tutorials on the web - here’s an example: www.htmldog.com
Feedback
Was this page helpful?
Glad to hear it! Please tell us how we can improve.
Sorry to hear that. Please tell us how we can improve.