Roles
The primary purpose of roles is to apply privileges to groups of users, rather than applying them individually. That makes managing large numbers of users easier and also more secure as it’s easy to see which privileges each type of user has and which they don’t.
If you’re not sure how to use roles, a good starting point might be to align them with the job roles in your organisation, or departments.
Roles also have some other important uses, such as multi-tenanting, described below.
Creating a role
- Go to the homepage and toggle development mode on 42 Click the ‘+ ROLE’ button at the top right of the screen

You should now see an editing screen with the details of the role you just created. You can give it a name and there are a few options:
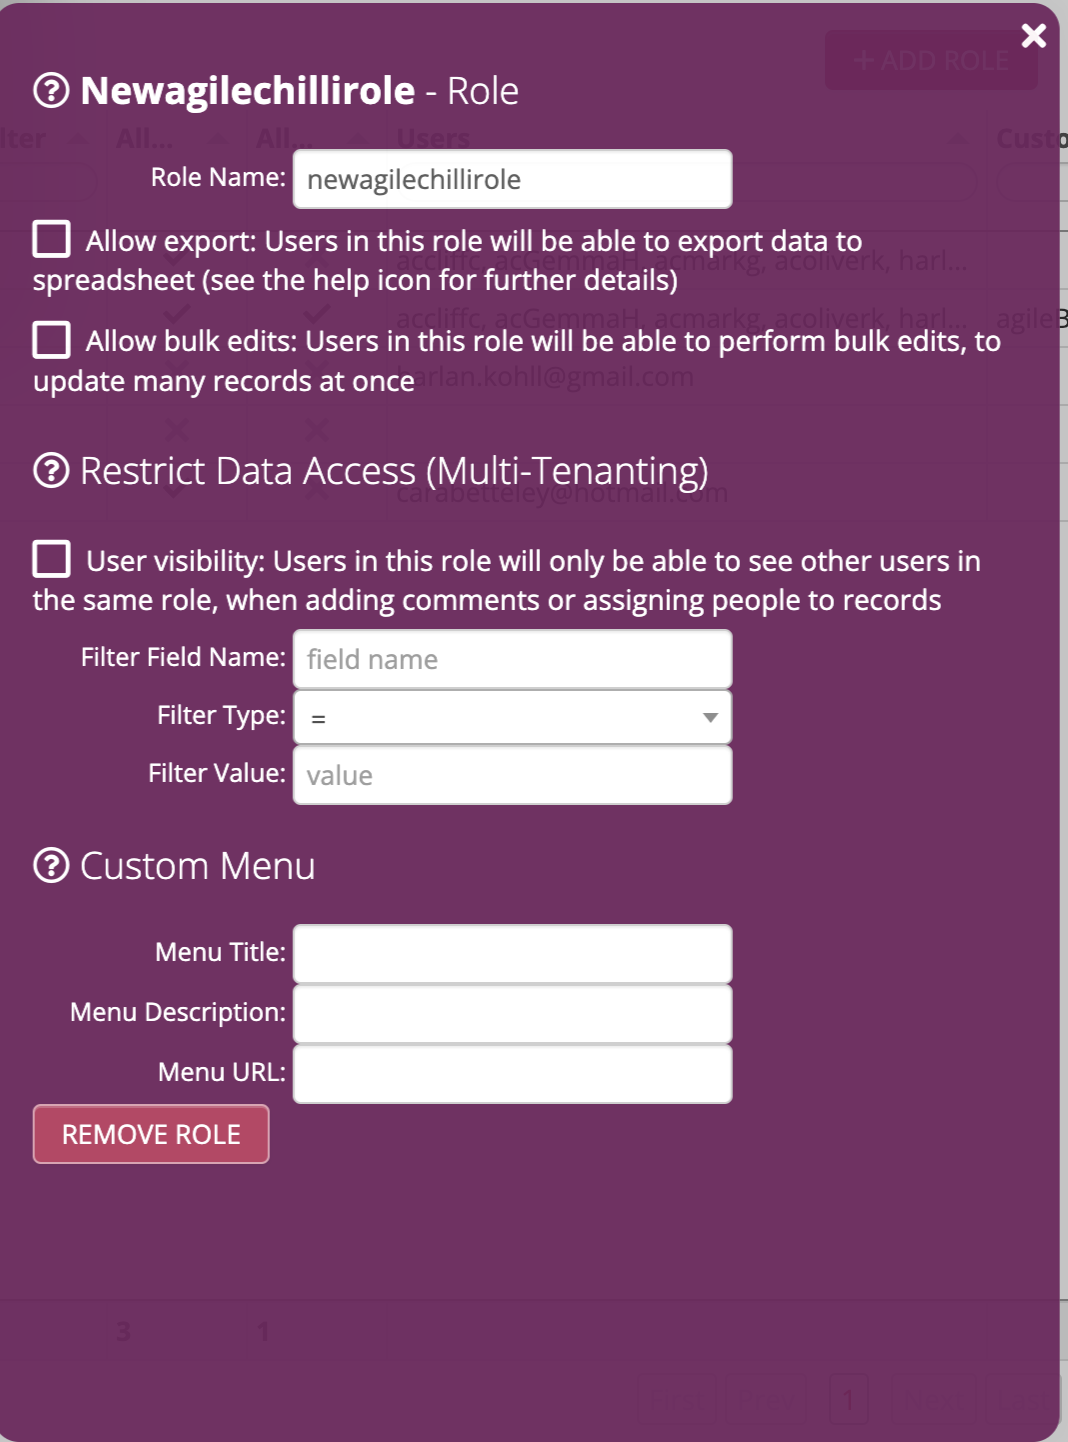
Allow Export
Referrs to exporting to spreadsheet - see spreadsheet exports
Allow global editing Users with edit privileges on a particular table, when added to this role, will be able to perform global edits on the data.
To perform a global edit, the user should
- filter the view (by typing into the filter boxes at the top of each column) to narrow down the rows to those which should be edited
- double click on a column header in a view, to edit the data in that field. The field must be from the view’s parent table.
- click the ’edit filtered’ button which appears
- type in the value you want to apply and follow through the prompts
User Visibility and Allow only multi-tenanting views to be seen Used to configure multi-tenanting
Members
Tick each user to add them to the role. Users will gain all the privileges defined by the role.
Privileges
Select the table privileges which will apply to members.
Privileges are additive - if a user is a member of multiple roles, they gain all the privileges from each of those roles added together.
Multi-tenanting
Multi-tenanting is the ability to separate users into groups who can’t see each other’s data. This can be used for example to allow different sets of companies, clubs, or membership groups (or whatever the organisational group is) to use the same system features whilst remaining separate from each other.
Multi-tenanting is a powerful feature that can be used not just for customers to segragate data amongst their users.
Partners can also use this facility if building software to widely market. In that case, each customer they sign up can very quickly be set up with their own private dataset, whilst the partner retains the ability to add features which will automatically apply to everyone.
To set up multi-tenanting:
- first add a text field to all tables in the system for which you want data to be segragated. The field must be named the same in every table, for example’s sake here let’s assume it’s called ‘account name’.
- Then create one role for each set of users who you want to segregate. We’ll assume there’s one called ‘Customer A’.
- In the role details screen for the Customer A role, tick user visibility. That means that users in this role won’t see users in other roles with the same option ticked. In other words, users from Customer A won’t be able to select Customer B or Customer C users when doing things like adding comments or assigning users to records.
- Under restrict data access in the role details, enter
account name = Customer A, i.e. Filter Field Name = ‘account name’, Filter Value = ‘Customer A’ - Finally, ensure the account name field is present in all views based on the table. When creating a view, any fields used for multi-tenanting will automatically be added but you may need to retro-fit any existing views.
This has two effects -
- When a user assigned to the Customer A role creates a new record in one of the multi-tenanting tables, the account name field will automatically be populated with the value Customer A (as entered under restrict data access). The field will be invisible to them - they won’t be able to see or edit the value.
- When looking at records in a view, a filter will be automatically applied so the user only sees records where account name = Customer A.
Users who aren’t a member of the role will see the account name field in the data editing form and in views. This can be useful for allowing e.g. group managers to see all data.
If any multi-tenanting roles are set up, then views which don’t contain a multi-tenanting field will be marked in red in the administration interface, as a warning. If a multi-tenanting user loads one of these views, they will see all records. Typically, practically all views will need the multi-tenanting field to be present.
Allow only multi-tenanting views to be seen
Optionally, this can be ticked. If ticked, user’s will only be shown views which contain the multi-tenanting field, ‘Account Name’ in the example above.
This is an added protection - if the multi-tenanting field is removed from a view, the user won’t see it any more. Otherwise they’d be able to see all data in the view, even that which they shouldn’t. This can also be useful to set when there is partial multi-tenanting set up, i.e. some views are multi-tenanted but others aren’t and you only want certain groups (e.g. people outside the organisation) to see the multi-tenanted parts, not everything.
Complex multi-tenanting
Multi-level
Users may be a member of more than one multi-tenanting role. For example you may use two multi-tenanting fields/roles, one for a company and another for a division. Members of a company role will be able to see data from all divisions in their company and members of both a company and a division role will only be able to see data for a single division.
Multi-account (via multiple roles)
It’s also possible for a user to be a member of multiple roles, all of which are set to multi-tenant on the same field, with different values. E.g. if a user is a member of Company A and Company B roles as in our example above, they will see data from those two companies when viewing records, but not Company C.
This works best when the user has read-only privileges on the data, e.g. for a manager reporting on those two companies. They can view records but not add new records, as the system is unable to determine the value of the account name field to use.
Multi-account (via contains filtering)
It’s also possible to define a role filter under restrict data access with a ‘contains’ rather than an ‘=’ filter. You can then use a naming convension for your account name values to allow members of this role to see multiple accounts. As above, users of this role will need to be read-only on the data.
Role properties
Brand name and domain
These two options allow system emails (password reset notification etc.) to come from a domain name of your choice and be branded with a particular ‘app’ name. This can be useful if you’re creating a public-facing app using Agilebase, rather than applications for your own staff.
To allow the domain name to work, you’ll need to contact us to set it up - our server will need to be authorised to send email from your domain.
Custom menus
It’s possible to add custom menu items into the user menu (the one at the top right that appears if you click your user icon). That means if your company has specific help pages or process documentation relevant to your organisation or application, you can make them available from within Agilebase.
Each custom menu has a title, description and URL, which will be opened in a new tab when the menu item’s chosen.
Simply add these into the menu title, menu description and menu URL properties of a role. Assigning that role to a user will add the menu item to their profile menu.
To add multiple menu items to a user or users, assign multiple roles, each with one menu item defined.
Feedback
Was this page helpful?
Glad to hear it! Please tell us how we can improve.
Sorry to hear that. Please tell us how we can improve.