Creating a view
In Agilebase, a view ‘belongs to’ a table. We’ll see what that means in more detail below, but for now, just choose a table to show data from to users. In examples on this section of the documentation we’ll assume we pick a contacts table.
We’ll also assume we already have some tables and some tiles.
To create a view
You can create a view from scratch, or clone an existing one then edit it.
To create from scratch
- Select (or create a new) table.
- Click the table you want to create a view from
- Once the table has been selected, click name and views on the floating sidebar
- Click Add View
- You should now see your freshly created view
There is an option Populate the view with fields from this table next to the Add View button. This is a convenience feature, which is ticked by default. When it’s ticked, the view created will contain the first 10 fields from the table - you can then remove any you don’t need or add more. When un-ticked, the view will start with no fields so you can add just those you wish.
To clone an existing view
- Open a view
- Toggle on the development mode and click ’edit view’ at the top left
- Open the ‘properties and options’
- Scroll down to the bottom of the panel and press the ‘clone view’ button
[snippet video - cloning a view]
Organising into a navigation structure
On creating a view, its editing panel will open. One of the first things it’s useful to do is put the field in a tile - use the Tile dropdown option, under properties to do so.
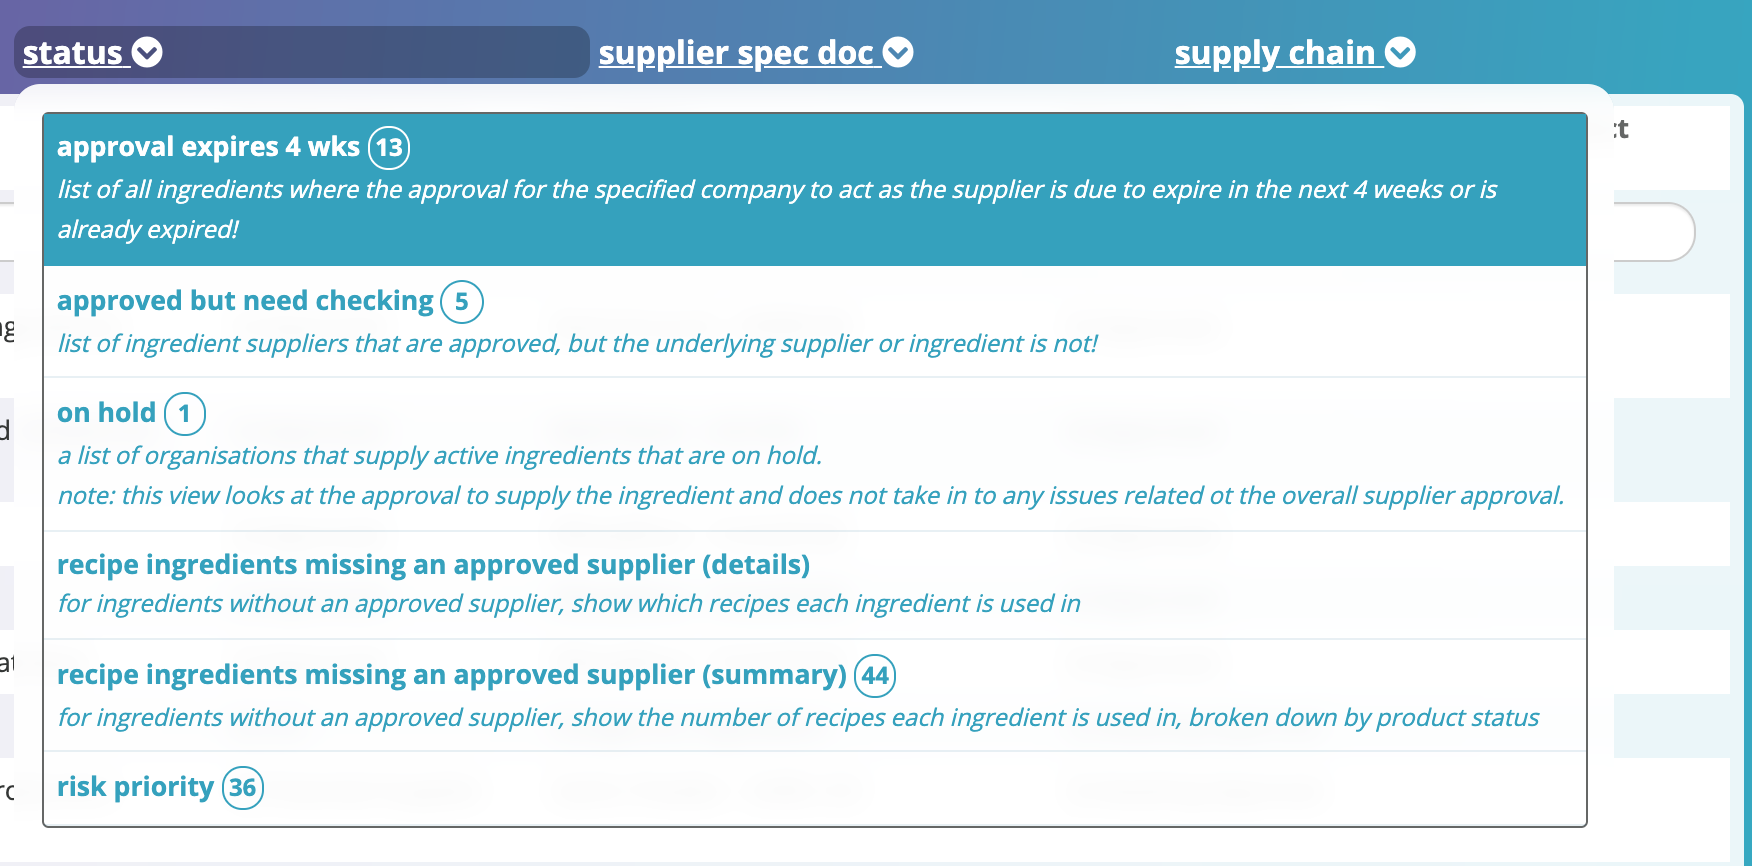
Within a tile, the view can be added to a menu by editing the view name. Simply prefix the view name with a menu name and a dash. So for example, naming a view contacts - all contacts will create a ‘contacts’ menu containing the view ‘all contacts’ visible to users.
Entering a view Help in the space underneath the name will provide help text for the view. This will be displayed in the menu underneath the view name. Here’s a screenshot of a sample menu, each with purpose completed.
Adding and removing fields
The core function of a view is usually to display a set of fields to people, as columns, so they can see data and search it.
When you create a view, the first dozen or so fields in the table it was created from will be added automatically. You can hover over a field and click the cross icon to remove it from the view.
To add a new field, make sure you’re in the ‘fields’ panel (the default). An ‘Add Field’ section will be visible, with two selectors. The first on the left selects the source of data. This is typically a table, but can also be a view.
The default source is the view’s parent table. The system also intelligently presents any tables which are related - for example, when editing a view based on contacts, ‘organisations’ may be available if each contact belongs to an organisation. Finally, any tables or views which are joined to this view are available as sources.
Once you’ve selected a source (if not the default), you can choose a field to add.
When you press the Add button you’ll be prompted to edit the field name if you like. You can just press OK to accept the name of the field as it is, but if you like you can edit it first. That doesn’t change the field name in its underlying table, but it does allow you to name the field something specific just for this view. For example, in your organisations table, you may have a field ‘Organisation Name’. In a view of invoices to customers, you may want to name this ‘Customer Name’, just for that view.
Applying sorts
When someone opens a view, they can sort it by any column they like by clicking the column header. However when building a view, you may want to set a default sort order.
To do that, when looking at the list of fields in a view, click the little up/down icon to the left of the fieldname. That will apply a sort to that field. Clicking it again will change the direction of the sort.
You can add sorts to multiple fields, they will take effect from the top down, i.e. the data will be sorted by the top field with a sort, then by the next one down etc.
Adding sections
If a view has many fields, it can be beneficial to organise them into sections, just like you organise table fields into sections using separators.
To create a section, edit the field or calculation which should form the start of a section and enter some text describing the section into the Section Name box.
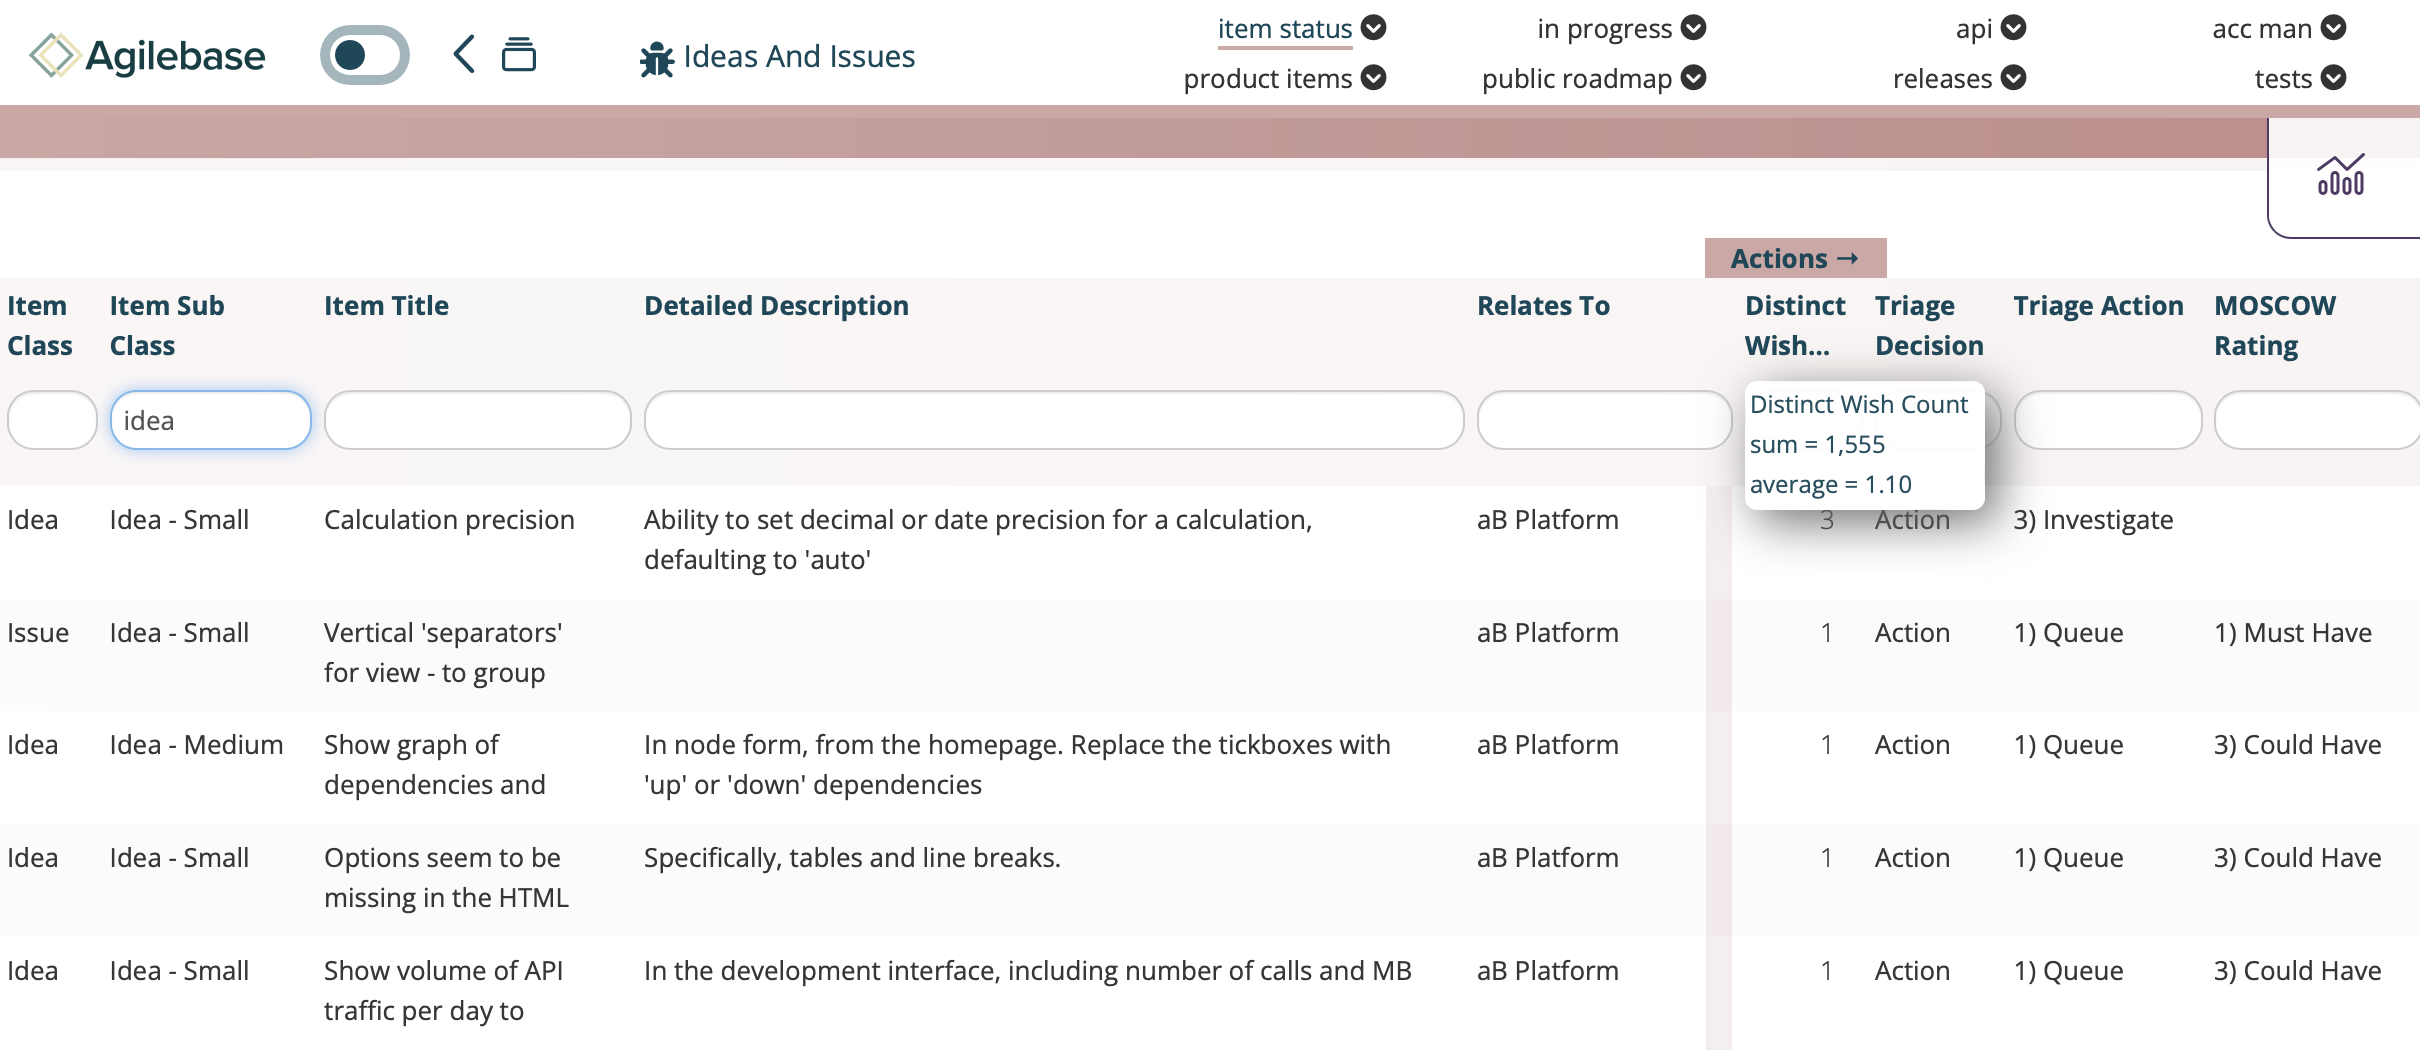
When a user hovers over a column name which is the start of a section (identified by the vertical bar on screen), the section name is displayed. Here’s an example where the field Distinct Wish Count is the start of an ‘Actions’ section.
Using a view
Once the view is created, how can someone use it? We won’t work through every possibility here as this documentation is for administrators rather than users, but here are some of the most important points in brief you may like to be aware of in order to support apps you build.
Finding data
By default, a search box appears under each column heading (the system can also be configured in a simplified way with a single search box to cover all fields).
The help icon (?) to the left of the search boxes details the types of search that can be performed. There are many, allowing for e.g. date-based searches, and and or searching, finding empty values etc. Helper features pop up for some field types, like date range pickers for example.
Seeing summary stats
Hovering over a column shows summary statistics, like a total and average (of all filtered records) for numeric fields, or a breakdown of dropdown/tags fields.
Loading a record
Once a record has been found, click a row in the view to load that record for viewing or editing. The record loaded comes from the table that the view belongs to (as referenced at the start of this page), even though the view may contain fields from other tables as well.
It’s also possible to use inline editing to edit the contents of fields directly in the view.
Pressing the plus button to the left of the view contents will create a new record in the view’s parent table.
Feedback
Was this page helpful?
Glad to hear it! Please tell us how we can improve.
Sorry to hear that. Please tell us how we can improve.