Field Types
A list of field types, the purposes and options of each
Adding fields to a table creates a form by which people (and other sources such as the API or workflows) can enter data.
There are various types of fields and field options which this section will cover.
If you are starting from scratch, Agilebase’s AI can propose a set of sensible fields for your table. Each can then be accepted or rejected according to your needs.
That includes adding relation fields to link your table with other existing tables in the system, for example to link a contact to an organisation.
This feature is only relevant to tables which don’t yet have any fields
Note: when you use the AI, the description you provide, along with a list of other tables in the system (to allow relation fields to be added) is sent to the third party AI provider. Please check that you are happy with their privacy policy
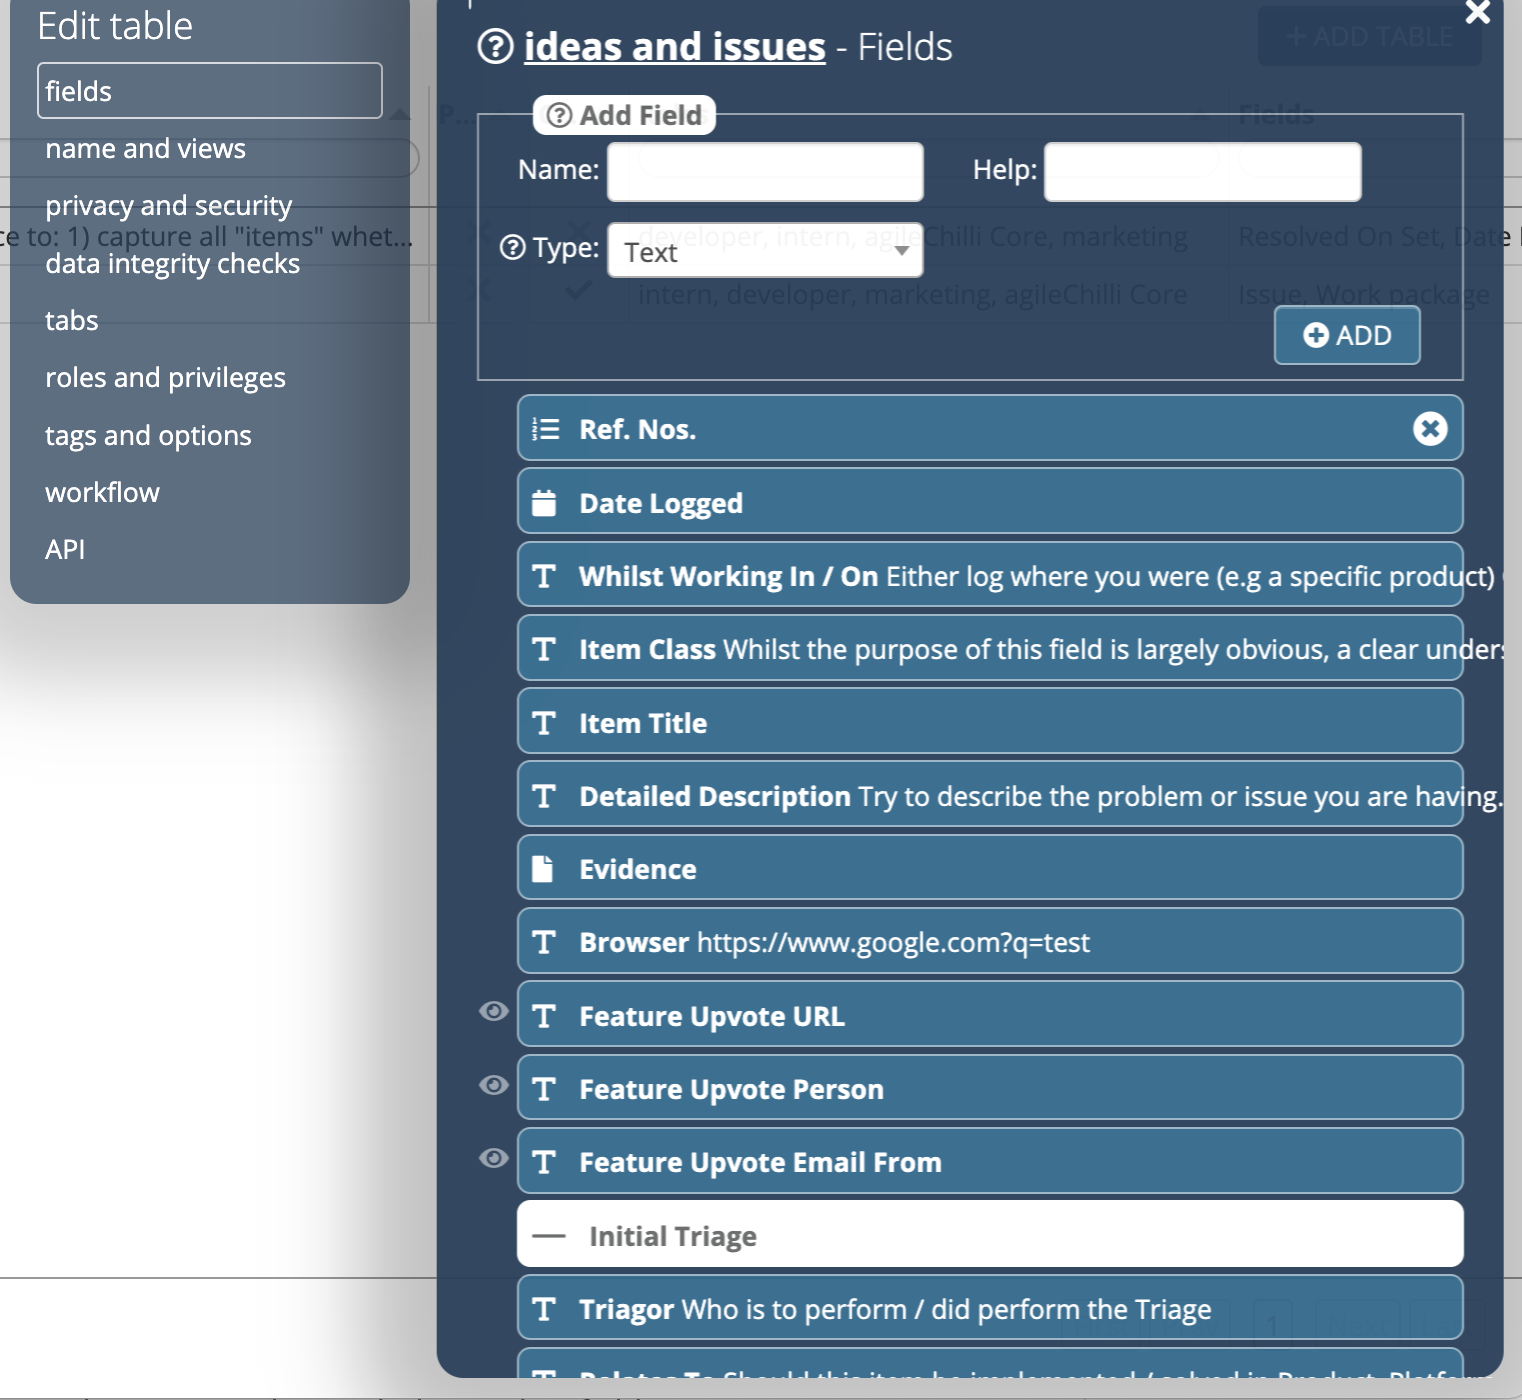
Any description added to the field will be used as inline help. URLs can be included and will be turned into clickable links. See help for more information.
Field name and description (help text) as well as field options can be altered at any time by clicking a field. Fields can be moved on screen by dragging.
However, once set, the field type can’t be changed. A number field can’t be converted to a text field for example. In particular, a decimal number can’t be converted to a whole number field and vice versa, as integers and floating point numbers are different data types.
There is a process available for changing field types, please see changing field types if you need to do that.
In the fields panel, click the x button to the right of a field.
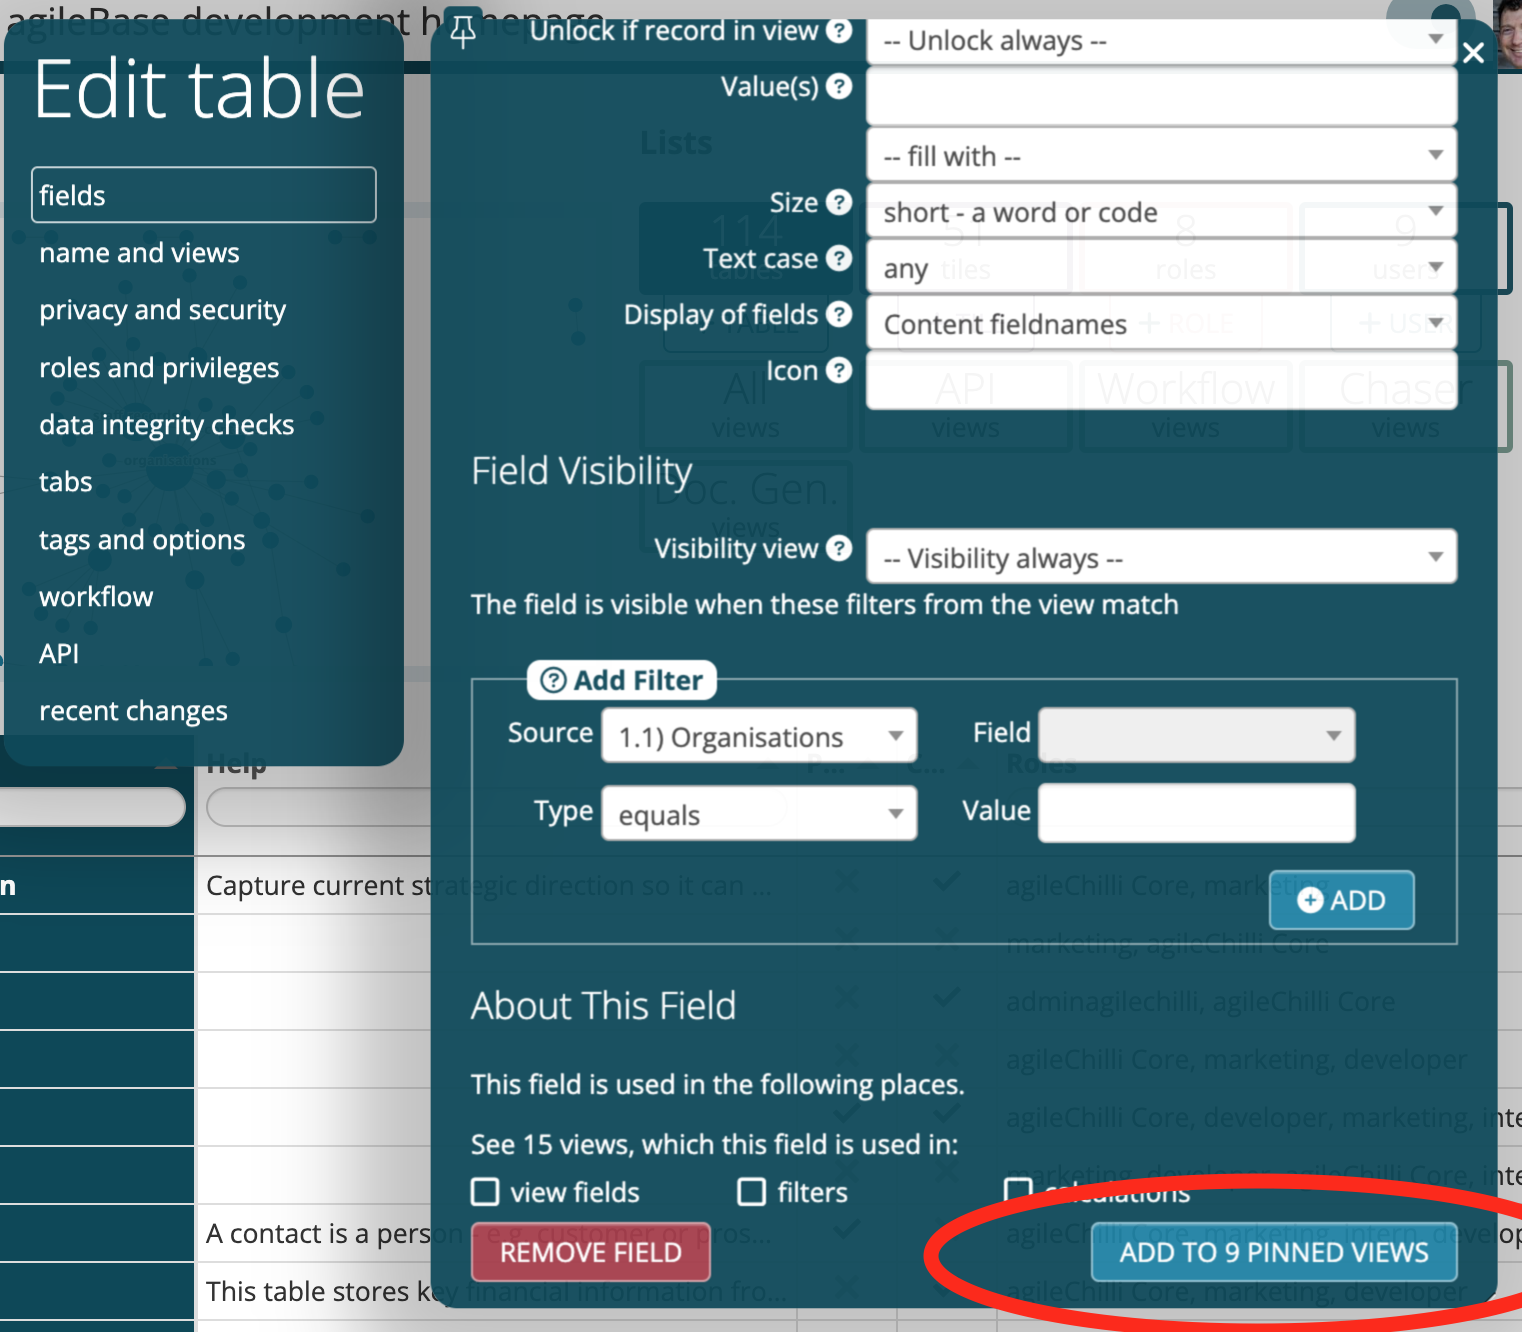
If the field is used in any other locations in your application, such as a view, you’ll be alerted to the fact. You’ll need to first remove the field from those locations before being able to remove it.
You can also see where fields are used by scrolling to the bottom of the field editing panel and looking under ‘Field Uses’.

First ‘pin’ all the views to which you want to add a field. You can pin a single view by clicking on the pushpin icon when editing it, or multiple ones at once from the ’name and views’ panel of a table when editing it.
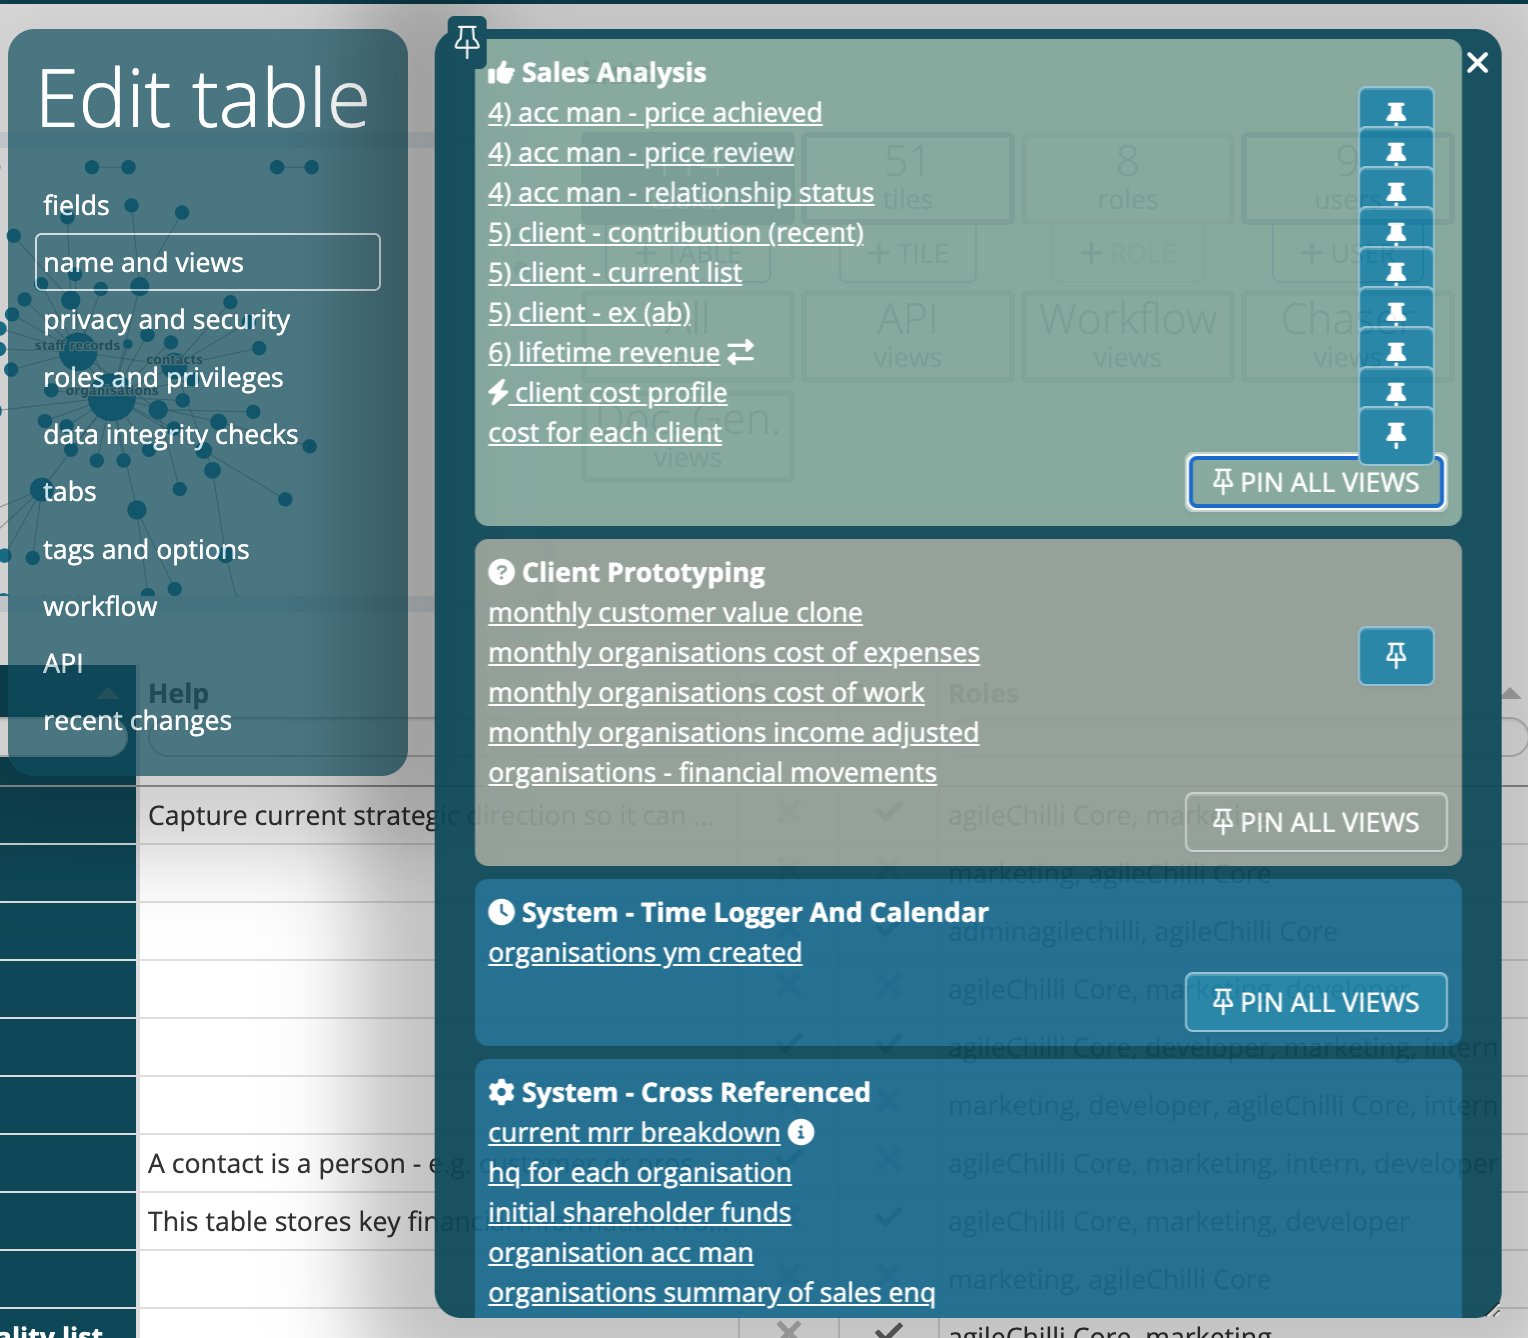
When editing a field, press ‘add to pinned views’. The field will then be added to all pinned views which don’t already contain it.
This can be particularly useful when introducing a multi-tenanting feature. Multi-tenanting means allowing different customers to access the same system, segregating their data so they each see only their own data. Part of the setup requires adding a new field to all (or most) of the views in the system.
A list of field types, the purposes and options of each
Customise the behaviour and display of fields
Was this page helpful?
Glad to hear it! Please tell us how we can improve.
Sorry to hear that. Please tell us how we can improve.